Showing posts with label Canning. Show all posts

Tuesday, November 20, 2012

Canning: Turkey Veggie Soup


Turkeys are going on sale every where right now and not being one to miss a good deal we picked up one at the local supermarket last week. We don't normally cook turkey on Thanksgiving because we go over to my in-laws to eat but we like to grab at least one turkey during this time of year to throw in the freezer or to can.

We try to make several meals out of one turkey or chicken for the two of us. This recipe will make convenient grab and go lunches or a super fast dinner.


We paid around $8 for our turkey and here's what we did with it. The Other Williams cooked the turkey in the oven first. We got:
  • 2 turkey breast to slice for several sandwiches
  • 3 turkey and gravy dinners for 2. One we ate the other 2 went in the freezer
  • 4 quarts of turkey veggie soup with turkey broth
  • 2 quarts of yummy turkey broth (click here to see how we make chicken/turkey broth)

Saturday, November 17, 2012

Canning Dried Beans


I love canning. I wish we were able to do a garden at our house but since we can't we still try to can local/regional produce. Pulling a jar of delicious food from the cabinet that you lovingly "put up" is a great feeling. Mainly we can tomatoes and  green beans, but this weekend we're trying our hand at dried beans. We canned black, navy, and kidney beans.

Thursday, March 25, 2010

The BEST Tomato sauce EVER!

This is Mario Batali's Basic Tomato sauce and it's by far THE best sauce ever. We make this in large batches and freeze it in smaller portions. Whenever we need a quick meal we grab some pasta, a veggie, and this sauce. Dinner in less than 15 minutes.

There are some important things to note about this recipe though. First buy the best canned tomatoes you can get a hold of. We use the Cento with great success. We've also used our own canned tomatoes. This is the base of the sauce and the better the tomatoes the better the sauce, don't skimp here.

Also use the fresh thyme. For the longest time we just used dried but recently tried it with the fresh. HUGE difference in flavor. We also keep the rinds from our parmesan cheese and toss it in for more flavor, but this isn't necessary.

* 1/4 cup extra-virgin olive oil
* 1 Spanish onion, 1/4-inch dice
* 4 garlic cloves, peeled and thinly sliced
* 3 tablespoons chopped fresh thyme leaves, or 1 tablespoon dried
* 1/2 medium carrot, finely grated
* 2 (28-ounce) cans peeled whole tomatoes, crushed by hand and juices reserved
* Salt
* Grated Parmesan, (optional)

Directions

In a 3-quart saucepan, heat the olive oil over medium heat. Add the onion and garlic, and cook until soft and light golden brown, about 8 to 10 minutes. Add the thyme and carrot, and cook 5 minutes more, until the carrot is quite soft. Add the tomatoes and juice and bring to a boil, stirring often. Lower the heat and simmer for 30 minutes until as thick as hot cereal. Season with salt and serve. This sauce holds 1 week in the refrigerator or up to 6 months in the freezer.

Wednesday, September 30, 2009

Freezer Stuffing - Mama's Beef Vegetable

This past weekend we did some major stuffing of our freezer. We made both lunches and dinners for future grab-n-go use and stocked our stand up freezer heavily with the goodies. We did the Adult Beanie-weanies, Minestrone & Beef Vegetable Soups (see recipe below), and Chili. I also made some trail mix that is super yummy for some healthy snacking! These were low cost meals that were easy to make in big batches and freeze well.

Having homemade grab-n-go lunches and dinners will allow us to eat more at home even when we're too busy to cook.

I've been eating this Beef Vegetable soup recipe all my life. My mother got the recipe from my Nannie and although it uses a lot of canned vegetables instead of fresh, for me you can't substitute the canned. It just doesn't have the flavor. My mom and grandmother would cook this soup for a minimum of 3 hours but I've had success condensing it down to 1.5 hours before. I would go any less than that.

This is also fabulous reheated. I remember coming home from school, pulling out the big pot with leftovers in it and heating up a small bowl in the microwave for a snack. This is great for lunches the next day or week.

This soup is very forgiving. You can't mess it up and you can use just about anything in it but I stick to my tried and true ingredients. I've also added my own touches to the soup, just as my mother did when she got the recipe from my Nannie. With each generation it gets better.

This is the kind of soup you want to take your time with. Open the windows on a fall afternoon, sit down with a good book, and pour all your love into the pot while the wonderful aromas fill your house. Patience is important for this one, it's not a quick fix. This soup will fill your tummy with warmth and love.

If I'm making a double batch I'll make it in two pots so as not to mess with the flavor too much. Great for freezing or on a cold day with some warm cornbread-everyone will love this one.


Mama's Beef Vegetable Soup


Servings: 6-8

1 lb Ground Beef
1 tbsp Italian Seasoning
2 large cans of Stewed Tomatoes (Or 2 Quarts of home-canned tomatoes)
1 can Succotash (between canned veggies and tomatoes at the store)
1 tbsp Tomato Paste
1 can Veg-all (don't get the low or no sodium)
1 small can of whole corn kernels
1 potato, peeled and diced
1 cup Elbow Mac noodles
Kosher Salt, to taste

Add beef & seasonings to a large soup pot and cook until browned. Drain grease.
Add tomatoes, succotash, and tomato paste. Then fill tomato can twice with water and add. Bring to a boil then turn down to a simmer. Let simmer for 30 minutes to and hour.
Add Veg-all and simmer 30 minutes to an hour. Add water if needed.
Add potato and corn and simmer 30 more minutes
Taste broth and season with salt, pepper, or other seasonings as you see fit.
Add Mac and simmer for 10-15 minutes. Serve hot with cornbread or cool and freeze.

Enjoy this tummy warming meal made with love.

Note: We have tried canning this soup and the noodles didn't hold up to well. If you want to can this soup leave out the noodles and follow canning instruction for tomato based soups.

Friday, September 11, 2009

Canning and Homemade Chicken Broth

We had a great labor day weekend. We spent most of the time around the house canning but we did make it up to NC to visit two wineries and picnic. Which was a lot of fun. Both were right outside of Charlotte, so not too far of a drive. We visited Owl's Eye and Baker Buffalo Creek vineyards.

We also went up to the Asheville Farmers market to pick up some yummy local produce to can for winter. We canned:

Green Beans


Froze our favorite, Silver Queen, corn. We have only been able to find this corn at the Asheville Farmers market. It's so good and super sweet and crisp.

Canned some homemade Dill Pickles! This was a first for me and was my project. I found a great recipe online. I have to wait 8 long weeks before I can open them and try them though. Hope they turn out good!

Lots of canned tomatoes

The Other Williams tries to make most of our chicken broth. We buy most of our chicken on the bone or as a whole chicken. The Other Williams does the butchering and she freezes the leftover chicken bones. She also has a veggie scraps bag in the freezer so when we have some scraps she tosses them into the freezer bag.

When she thinks she has enough to make a big batch of broth she throws everything into a big pot, covers it with water and boils it for an hour or better. Then she puts the finished broth into mason jars and they go into the freezer. There is no beating the taste of her homemade, made with love, chicken broth!

Saturday, August 9, 2008

Blueberry Jam, Anyone?


My dad has 4-6 very large wild blueberry bushes growing on his property. We normally go and pick a couple of gallons to snack on and freeze the rest. This year we decided to really pick a lot and I wanted to make some jam. I used this site and recipe to make my jam but I did cut the recipe in half because I like to can jam in the smaller 4oz jars. With cutting the recipe in half I still ended up with 11 jars of jam but it was sooo good. I also always use the low sugar recipe and pectin because the fruit is sweet enough by itself. I haven't had much luck with juice sweetened jams so I stick to the low sugar. The sugar is necessary for preservation also.


**This is not a recipe, some steps may be more detailed than what is below, please refer to this link for the full recipe and how-to guide.


Start with two cups of Blueberries, rinsed and sorted.


I used the food processor but you can also just mash them with a potato masher.


Into a pot with the pectin, lemon juice, water, and sugar and brought to a boil.


Once you get the consistency you're looking for, pour into the jars.


Place on clean lids, and can.

Thursday, August 7, 2008

Adventures in Canning

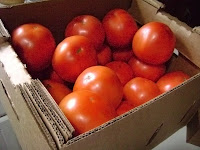
Well we're back from vacation and we didn't waste much time. This weekend we went to Asheville for an Art Show and on the way home we stopped at the farmers market and pick up a case of tomatoes to can. We'd love to can from our own garden, but we've never had good luck growing enough to can because we eat them as they come in. So these very large beauties from just up the road and have good flavor for canning and will work beautifully.

We can for many reasons, the main one is because it taste better than store bought canned tomatoes but also to reduce waste, transportation pollution, and it's a lost art in our opinion that we'd like to continue. We use these through out the fall and winter in tons of dishes so they are never on the shelf for very long. We're actually planning another canning session soon so we have enough to last till next year.

Below is just a quickie course in canning. You'll need to sterilize your jars and figure how long the process time will be in your area.

The first thing we do is core the tomatoes.

Next we carve an X in the bottom to help with peeling the skins.

Beautiful tomato shot

They then get placed in a large pot of boiling water for a 2-3 minutes to loosen the skin. We do this outside to keep the heat out of our house.

The tomatoes are then put directly into an ice bath to stop the cooking, you don't want mushy tomatoes!

The skins are then peeled and should come off very easily.

We've found that the larger you can keep the tomato the better the flavor. Whole tomatoes are even better but you can quarter, diced, or crush them before adding to the sterilized jars. Top with a sterile lid and process in a pressure cooker or canner.

We ended up with around 18-20 jars (pints and quarts) from the box we got.

To read up more on canning fresh produce check out this link!

LinkWithin

Related Posts with Thumbnails